


Resin 3D printing is renowned for its exceptional precision and its ability to reproduce very fine details, making it a preferred choice for manufacturing miniatures, prototypes, or technical parts. However, this technology is highly sensitive to settings and printing conditions.
The aim of this article is to present the most common mistakes in resin printing and provide concrete solutions to avoid them. By following these tips, you will improve the quality of your prints and reduce the risk of failures.
1. Poor adhesion to the build plate
One of the most frequent issues is parts detaching either from the very first layers or during the print.
Causes :
- – Dirty or overly smooth build plate.
- – Incorrect leveling of the build plate.
- – Insufficient exposure time for the first layers.
- – Resin too cold, resulting in higher viscosity.
Solutions:
To solve this issue, it is essential to properly recalibrate the build plate by following the procedure recommended by the manufacturer. If the first layers still struggle to adhere, it may be necessary to slightly increase the exposure time to strengthen initial adhesion.
It is also important to ensure that the resin is at room temperature in order to reduce viscosity and improve adhesion.
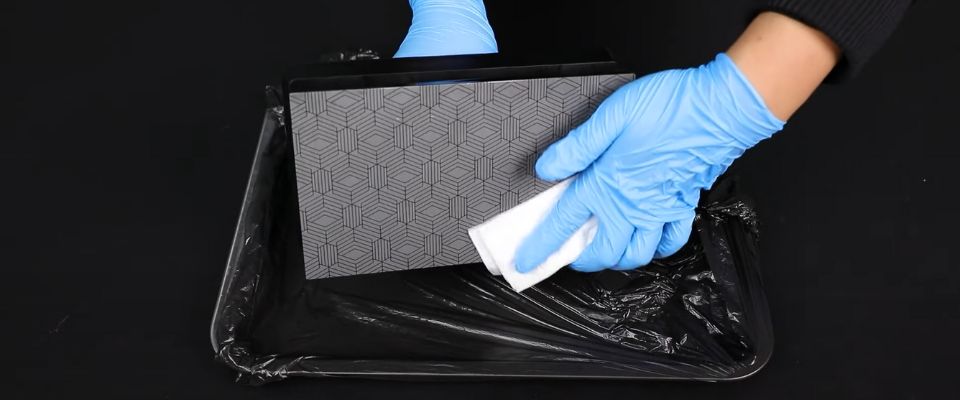
Finally, cleaning the plate with isopropyl alcohol or lightly sanding it creates a surface more favorable to resin adhesion.
2. Layer separation or delamination
Some prints show cracks or a visible separation between layers.
Causes :
- – Underexposed layers.
- – Overexposed base (bottom) layers, making them too rigid.
- – Lifting speed too high or insufficient resting time.
- – Residual resin or scratches on the film.
Solutions:
To prevent delamination, it is important to adjust the exposure time of the layers. Regular layers should be slightly more exposed, while base layers need a slightly reduced exposure to maintain flexibility.
Reducing the lifting speed and increasing the resting time between movements also helps to reduce stress on the layers.
Regular cleaning of the vat and checking the condition of the film ensure consistent adhesion and reduce the risk of layer separation.
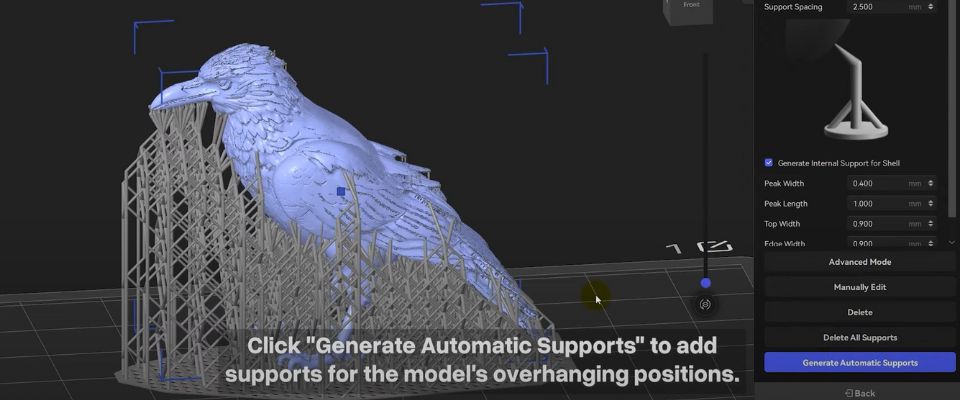
3. Inadequate or insufficient support structures
A print can collapse or show missing areas if the supports are insufficient.
Causes :
- – Using the wrong type of support (tree vs. grid).
- – Supports too thin or missing.
- – Poor placement of supports, leaving critical areas unsupported.
Solutions:
To ensure stability, it is recommended to increase the density and thickness of the supports, especially in critical areas.
Manually placing supports where the part is most fragile helps to prevent collapsing of overhanging sections.
Depending on the model, experimenting with different support types, such as sturdier grid supports, can also improve print strength and reduce the risk of missing zones.
4. Surface defects (roughness or “orange peel” effect)
Grainy or textured surfaces are another common issue.
Causes :
- – Poor adhesion between layers or insufficient drainage.
- – Overexposure or underexposure of layers.
- – Resin contaminated with dust or debris.
Solutions:
To achieve smooth and uniform surfaces, it is essential to finely adjust exposure according to the resin used.
Filtering the resin before each print removes unwanted particles, while keeping the printing environment clean helps to limit contamination.
Finally, slightly reducing the lifting speed promotes better adhesion between layers, which significantly improves surface quality.
5. Holes or missing areas
Some objects show cavities or empty zones that were not intended in the design.
Causes :
- – Local underexposure.
- – Walls too thin in the slicer.
- – Air bubbles trapped in the resin.
- – Hollow parts without drainage holes.
Solutions:
To fix this problem, you should slightly increase overall exposure so the resin cures properly in all areas. Thickening the walls in the slicer helps reinforce the structure and reduce missing zones.
Mixing the resin well before printing allows air bubbles to rise to the surface, preventing them from being trapped. For hollow parts, adding drainage holes ensures excess resin can escape, reducing the risk of voids.
6. Overloading, poor placement, or incorrect model orientation
Improper part arrangement and unsuitable orientation can cause failures or deformations.
Causes :
- – Too many models on the build plate.
- – Always printing in the same area, leading to localized wear of the film.
- – Flat orientation on the plate, causing warping and visible layer lines.
Solutions:
To reduce overloading issues, it is recommended to avoid overcrowding the build plate and instead spread prints across several batches.

Varying the printing zones and rotating the vat helps distribute wear on the film.
As for orientation, tilting models instead of placing them flat improves resistance to lifting forces and reduces deformations or visible lines on surfaces.
7. Unstable temperature and environment
Environmental stability is crucial for proper resin curing.
Problems:
- – Deformed prints.
- – Poor curing of layers.
Solutions:
Maintaining a stable temperature between 20 and 25 °C is essential for consistent print quality.
It is also important to avoid drafts or direct heat sources around the printer, as they can cause uneven resin curing and lead to deformations on the part.
8. Neglecting equipment maintenance (FEP, build plate, vat)
Poor maintenance increases the risk of failures and shortens equipment lifespan.
Risks:
- – Damaged or cloudy FEP/ACF/PFA film.
- – Dirty LCD screen.
- – Contaminated resin.
Solutions:
Regular maintenance is essential to ensure print quality and extend the printer’s lifespan. Cleaning the build plate, vat, and screen prevents hardened resin and dust buildup.
Inspecting the FEP/ACF/PFA film and replacing it if scratched or cloudy ensures even light transmission.
After a failed print, filtering the resin to remove particles keeps it clean for future prints and reduces defects.
Conclusion
Resin 3D printing is a highly precise technology, but it requires discipline and method. The most common errors involve adhesion, supports, exposure, orientation, maintenance, and environmental factors.
Final checklist before printing:
- – Filter the resin and check the film.
- – Calibrate and level the build plate.
- – Verify supports and orientation.
- – Check exposure settings and temperature.
- – Clean the build plate, vat, and screen.
Adjust only one parameter at a time and keep track of your results. Don’t hesitate to share your experiences and tips with the community to progress faster.
✅ Why Choose Polyfab3D?
Premium Support and After-Sales Service: Starting from your needs, we will guide you to the most suitable solution and provide long-term support for its implementation and daily use.
Official Reseller: Polyfab3D is a certified reseller of top brands, ensuring you get official products, exclusive access to the latest innovations, and priority technical support.
Fast Delivery and Customer Satisfaction: Polyfab3D is committed to providing you with an optimal and fast experience. Positive feedback from our customers rewards us and proves the reliability and efficiency of our service.
Contact us now for a personalized recommendation tailored to your needs, budget, and ambitions.